


Tutorial (with pictures) how to install IonCube PHP Loader module on CentOS 6 with Apache and PHP5 installed. This module is basically PHP extension that handles the reading and execution of encoded files at run time. Shortly, you may see a script encoded with IonCube and as per itsdeveloper says, you must have IonCube Loader installed on your server. How to install it?
PREREQUISITES
A server (VPS or Dedicated) running CentOS, Apache and PHP. In this guide I use CentOS 6.4 x64 hosted by Digital Ocean.
HOW TO INSTALL
METHOD #1:
Step 1 – Login to your server and follow my previous guide about Basic setup for CentOS before you build a live web server. You may and may not follow that tutorial but if you followed, it will give you some basic security tweak to your server.
Before you proceed to the next steps, it is better to explain that all commands in this tutorial are written without the “sudo” prefix. However if you disabled root login and you logged in using another username with root privilege, you can add the “sudo” prefix all by your self. Alternatively you can simply type su, hit Enter and type in your password twice to switch login as root. You may also need to type this command to go to the root directory:
1
| cd ~ |

Step 2 – Go to your site’s public folder (root directory of your site) which in my case is /var/www/servermom.com/public_html
1
| cd /path/to/www |
example:
1
| cd /var/www/servermom.com/public_html |
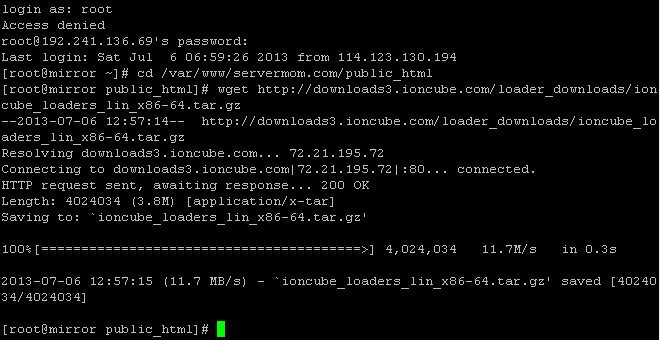
Step 3 – Download IonCube Loader file using wget command:
For CentOS 32-bit use:
1
| wget http://downloads3.ioncube.com/loader_downloads/ioncube_loaders_lin_x86.tar.gz |
For CentOS x86_64 (64-bit):
1
| wget http://downloads3.ioncube.com/loader_downloads/ioncube_loaders_lin_x86-64.tar.gz |
If the links are not working anymore, please check the latest download links athttp://www.ioncube.com/loaders.php.
Step 3 – Extract the file. Issue this command:
For CentOS 32-bit use:
1
| tar xvfz ioncube_loaders_lin_x86.tar.gz |
For CentOS 64-bit use:
1
| tar xvfz ioncube_loaders_lin_x86-64.tar.gz |

Step 4 – Now launch your favorite web browser up (like Firefox, Chrome, etc) then access loader-wizard.php via your server’s ip or domain name:
http://xxx.xxx.xxx.xxx/ioncube/loader-wizard.php
or
http://www.domain.com/ioncube/loader-wizard.php

Step 5 – From there simply read the instruction and the wizard will tell you which Loader version is suitable for your PHP version. In this case you choose whether Dedicated / VPS or Local Install. Once the wizard tells you which Loader version you should use on your server. In my example is
ioncube_loader_lin_5.3.so.
Note if you get a message saying:
Please note that the following problem currently exists with the ionCube Loader installation:The necessary zend_extension line could not be found in the configuration.
In this case you have to firstly install Zend Optimizer.
Step 6 – Now copy the loader .so file to:
32-bit server: /usr/lib/php/modules
64-bit server: /usr/lib64/php/modules
example:
1
| cp /var/www/servermom.com/public_html/ioncube/ioncube_loader_lin_5.3.so /usr/lib64/php/modules |
screenshot

Step 7 – Now download the 20ioncube.ini file from the link in the bottom part of that page. Once downloaded, upload that file to /etc/php.d directory. You can use ftp or upload that file to another host then grab it via widget command. But in my case, I simply prefer to open that file using Notepad then copy it to Nano editor. This is my way:
1
| nano /etc/php.d/20ioncube.ini |
now open the downloaded file using Notepad, copy the content and paste it to nano editor.

paste it to Nano

Once done, hit Control+O to save then Control+X to exit.
Step 8 – Optional: Go to /etc/php.d/ directory and type ls to see all modules. Make sure 20ioncube.ini file appears first then ZendGuard.ini.
Step 9 – Restart Apache service:
1
| service httpd restart |
screenshot:
Step 10 – Go back to your browser where you open loader-wizard.php page. Scroll down to the bottom and click the link in “When the server software has restarted, click here to test the Loader.” line to re-test the configuration.
If you did everything correctly, you’ll see this message:
Loader Installed SuccessfullyThe ionCube Loader version 4.4.1 for PHP 5.3 is installed and encoded files should run successfully.
That’s it. Enjoy.

OTHER METHODS
Quicker methods (sorry I don’t try it yet so use with your own risks):
METHOD #2:
Step 1 – Issue the first command:
1
| wget -q -O - http://www.atomicorp.com/installers/atomic |sh |
Step 2 – Then lets install it via yum:
1
| yum install php-ioncube-loader |
METHOD #3:
Step 1 – Add new repository:
1
| rpm -ivh rpmbuild/RPMS/x86_64/php-ioncube-loader-4.2.2-2.art.x86_64.rpm |
Step 2 – Let’s build it:
1
| rpmbuild -bb ~/rpmbuild/SPECS/php-ioncube-loader-art.spec |
Step 3 – Issue this next command:
1
| rpm -ivh rpmbuild/RPMS/x86_64/php-ioncube-loader-4.2.2-2.art.x86_64.rpm |
Final words: Honestly I prefer to use the first method which is so manual and traditional but it is safer.
